I’ve been making different variations of this dish for a few years now—everything from chicken to steak, and now this ground beef version. It’s truly a one-pan (or one-skillet) meal, which makes it perfect for busy nights. The corn-filled tortillas are the real star here—the flavor they bring and how they complement the enchilada sauce is next-level. Once everything bakes together, that golden, cheesy crust on top is what really seals the deal and always impresses. With minimal prep, simple ingredients, and fully customizable toppings, this is the kind of recipe you’ll keep coming back to.

Cheesy Beef & Corn Enchilada Skillet
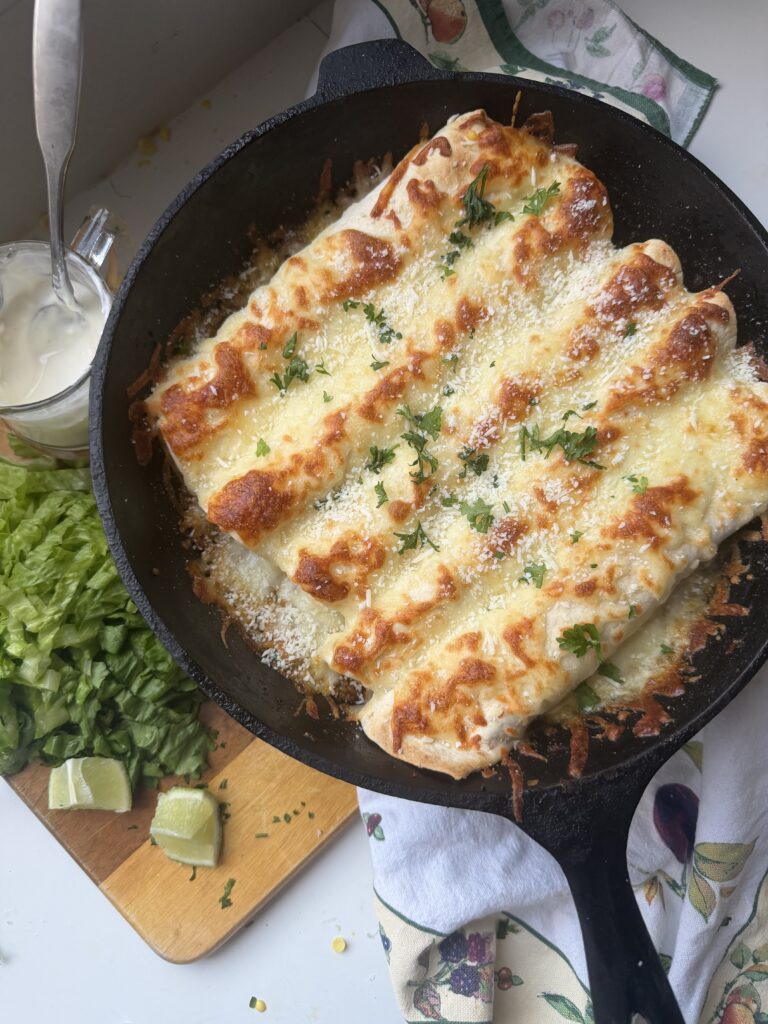
Description
This cheesy beef and corn enchilada skillet is the ultimate easy comfort meal. Made with seasoned ground beef, sweet corn, and a rich enchilada-style sauce, everything comes together in one pan and is topped with plenty of melty cheese. It has all the bold, cozy flavors of traditional enchiladas without the extra steps, making it perfect for busy weeknights. Simple, satisfying, and family-friendly—this is one of those dinners you’ll keep coming back to.
Ingredients
Beef Skillet
Corn Enchilada
Simple Lime Sauce
Toppings
Instructions
-
Preheat the oven to 400°F.
-
Heat 1 tablespoon of oil in an oven-safe skillet or cast iron over medium heat. Add the ground beef and cook until browned, breaking it up as it cooks.
-
Add the diced onion and garlic to the beef. Cook for 2–3 minutes until softened and fragrant. Season with garlic powder, smoked paprika, onion powder, adobo seasoning, salt, and pepper.
-
Stir in the red enchilada sauce and let the mixture simmer for a few minutes. Taste and adjust salt as needed. This is also where you can add more enchilada sauce if you prefer a saucier skillet.
-
In a bowl, mix together the fresh corn, room-temperature cream cheese, Greek yogurt, chili powder, Mexican blend cheese, chives, salt, and pepper until well combined.
-
Spoon about 2–3 tablespoons of the corn filling into each flour tortilla. Roll them up gently.
-
Arrange the rolled tortillas on top of the beef mixture in the skillet. Sprinkle the remaining 1 cup of Mexican blend cheese evenly over the top.
-
Transfer the skillet to the oven and bake for 10–15 minutes, or until the cheese is melted, bubbly, and lightly browned.
-
Top with chopped romaine, fresh lime juice, or drizzle with the lime sauce (mix mayo, sour cream, lime juice, and salt to taste). Serve warm and enjoy every cheesy bite.
Note
- Fresh corn adds a subtle sweetness that balances the savory beef, but frozen corn works in a pinch.
- Let the cream cheese come fully to room temperature—it makes mixing the corn filling much easier. If you don't have time, defrost in the microwave for 1-minute increments.
- This dish reheats beautifully and makes great leftovers for lunch the next day.